
"The Barcode of the Cosmos"
Please note that this Activity follows the format of the printed Teachers Guide, beginning with a Teacher Background, and then sections following the standard PTK "Engage/Explain/Explore, and Adapt/Extend/Connect" format.
Activity 1.3 Barcode of the Cosmos: Exploring the Electromagnetic Spectrum
(Describing the spectrum as a barcode is owed to Richard Dawkins excellent book "Unweaving the Rainbow", see "Resources".)
Teacher Background:
Every object in the universe-stars and human beings-emits, reflects, and absorbs electromagnetic radiation. The characteristic way an object does this can be used to explore its chemical and physical composition and state. Infrared radiation, radio waves, ultraviolet light, x-rays, and gamma rays are all different forms of electromagnetic radiation. They are alike in that all are waves, but the length of the wave (i.e. the wavelength) varies with the different kinds of radiation. Unaided human eyes can only see visible wavelengths. Weve evolved to use that portion of the Suns output which most readily reaches the surface of the Earth. Unprotected human skin (especially fair skin) is also, unfortunately, an ultraviolet "radiation detector" and turns red after exposure.
Technically speaking, electromagnetic radiation is a transverse energy wave with two components-an electric field and a magnetic field. A wave can be characterized by wavelength and frequency. But unlike other types of waves, such as sound waves or waves in water, electromagnetic radiation does not require the involvement of matter to transfer energy. It passes through a vacuum at the constant speed of 300,000 km per second (the speed of light). The basis for this behavior is the photon, a small bundle of mass-less electromagnetic radiation. So we need to think of electromagnetic radiation (in one of the mind-blowing findings of 20th Century physics) as being at various times both a wave and a particle.
These different wavelengths and frequencies are organized into what we call the "electromagnetic spectrum", or EMS. In the EMS, as wavelength decreases, frequency and energy levels increase. Humans can see only a portion of the EMS, called the "spectrum of visible light." But these visible wavelengths make up only a small section of the total EMS. Longer wavelengths outside the visible range in one direction can be felt as infrared radiation or heat. Humans radiate infrared radiation since they are warm-blooded organisms and body heat is released into the environment. Shorter wavelengths, just outside the visible range in the other direction, are called ultraviolet radiation. Sunburn is evidence of this radiation.
This Activity provides a way to make the key concepts of wavelength and frequency meaningful. It then offers students the opportunity to explore portions of the EMS reprising some of the classic experiments first undertaken by Newton, Herschel and Ritter, through which we humans discovered key characteristics of the EMS existing beyond visible light. You may find that by breaking down your class into "Spectrum Teams" and having them undertake the various activities, writing up their own particular labs as a poster or other form of presentation , and then reporting back to the whole class, you can make the entire spectrum meaningful. Sorry, but even we could not come up with a hands-on gamma ray Activity!
Objectives (grouped by sub-Activity):
1.3.1 Newtons Rainbow
Students will create a spectrum using a prism, and record the sequence of colors to be found in visible light.
Students will realize that the colors of the spectrum always appear in the same order, and that white light is a combination of those colors.
1.3.2 Making Waves
Students will identify and define wavelength, frequency and amplitude.
1.3.3 Herschel and Infrared
By using heat sensitive paper, students will detect the presence of infrared radiation as they observe a heater coil change from no color to red.
1.3.4 Ritter and ultraviolet
Students will demonstrate that light energy exists beyond the purple end of the spectrum, by using blue-line paper to produce evidence of ultraviolet radiation.
1.3.5 Hearing Radio Waves
Students will experiment with sound waves to show how interference patterns create "dead" and "loud" spots.
1.3.6 Putting It All Together
Students will be able to identify key components of the EMS in terms of wavelength and relationship to visible light.
Students will be able to identify many ways in which parts of the electromagnetic spectrum other than visible light are encountered in daily life.
Vocabulary:
amplitude, crest, frequency, gamma ray, infrared, interference, prism, radio, trough, ultraviolet, wavelength
Engage:
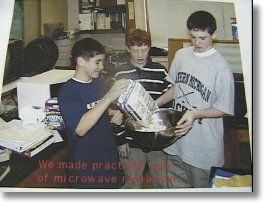
Ask students to extend a bare arm into bright sunlight. Have them report what they feel. Do they see any radiation on their arms? How do they explain the warmth they are feeling? Ask if they can think of other situations where energy is present and some type of change occurs. Make a list, guiding discussion to include microwave ovens used for cooking, communication satellites, x-rays for medicine, radio and TV waves for communication, etc.
Ask students if sunlight, radio waves, microwave ovens in kitchens and medical X-rays are somehow related, or are all different. Ask students if all living creatures on Earth see the same world around them. (Bees see "bee-purple" and many insects see patterns of ultraviolet light on flowers which we do not perceive.) List all answers. Guide discussion to include the full spectrum of radiation, such as medical X-rays, infrared devices such as remote controllers, ultraviolet, etc: you may be surprised by how well science fiction on TV [e.g. Star Trek, The X-Files, etc.] and in film has exposed them to the names of (if not actual understanding of) more exotic forms of radiation.) Ask how they know that these forms of radiation exist, and how they impact their lives. Accept all ideas.
Now theyre ready to hop onto the "Shoulders of Giants" (as Newton expressed a scientists debt to those who came before), and explore the electromagnetic spectrum for themselves. We suggest starting with Newton and prisms, then moving on to wavelength, and then exploring as many other regions of the EMS as you can-perhaps by using "Spectrum Teams" as "Co-Investigators" as suggested above.
Activity 1.3.1 Newtons Rainbow
Teacher Background:
Sir Isaac Newton in 1666 was the first to realize that white light was a combination of all of the colors of the rainbow. His experiments with prisms led the way for other scientists to probe the secrets of the spectrum. Until Newton, prisms were regarded as little more than playthings. Newton used them to break sunlight up into its constituent colors. Its not obvious that white results from combining colors. If you take red, orange, yellow, and all the other rainbow colors of paint and mix them up, you just get a murky brown-black. But if you do the same by mixing light from red, blue and green filters, the result is white light. To prove this to your students, create a color wheel with all of the colors of the spectrum. (The Lockheed Martin/University of Montana Yohkoh spacecraft education site [YPOP] provides simple but excellent instructions:
http://mithra.physics.montana.edu/YPOP/Classroom/Lessons/Filters/filterprint.html)
Materials:
prism
light source
slide projector
diffraction grating (4 gratings are included in the PASSPORT TO THE SUN
Multimedia Kit.)
Explain/Explore:
On a sunny day, take a prism over to an open window and stand it on end. Manipulate it until a spectrum is projected onto a wall in the classroom. Ask students what they see. Most will tell you its a rainbow. Ask them what they know about it. There will be a variety of answers: keep probing until someone says that the colors always appear in the same order. Why does that happen? Something must happen to the light as it passes through the prism.
Take a pencil and put it in a glass of water. Ask what happened to the pencil? They should note that its magnified, but also that it appears to be bent. Light is bent or refracted by the water. The same thing happens with sunlight when it passes through the prism. Since each color thats "hiding" in the white light has a different wavelength, its bent by a slightly different amount, and so is separated into the spread out rainbow which emerges.
If you want a more controlled alternative to the prism, take a blank 35 mm slide and cover it with black tape so that a slit about 3 mm across is formed. Place the slide in a projector so that the slit is vertical. Aim the projector at a screen and place a diffraction grating in front of the lens. A beautiful spectrum will be generated, guaranteed to produce gasps from even the most reluctant scholar!
Activity 1.3.2 "Making Waves"
Materials:
for teacher demonstration:
one length of rope 1-2 meters in length
glass baking dish or wave box
small marble or rock
overhead projector
for each team of 3-4 students:
rope
prism and card with slot 3 mm wide cut in it
access to sunlight, or to a "full-spectrum" light bulb/source
card or 8" x 11" plain paper
colored pencils or markers providing "all the colors of the
rainbow"
aluminum foil
flashlight or other light without a shade and non-frosted bulb
Engage:
Procedure for a teacher demonstration
Fill a glass baking dish with water and place it on top of an overhead projector. Turn the projector on, and (GENTLY!) drop the marble, or rock into the water and observe what happens. (Use the wave box if you have one available.) Have students record their observations in their SUNlogs. Have them draw the patterns they see being formed.
Explain/Explore:
Group students in teams of 3-4 and give each team a 1-2 meter long piece of rope. Ask them to send a wave through the rope. Have them record their observations in their SUNlogs. Ask students if the wave causes matter to be transported through space. (Of course the rope moves up and down, but thats not what youre asking.) Accept all answers. Give each team a piece of colored tape or piece of yarn. Have them place tie the tape or yarn on the rope to mark a particular point on the rope. Direct students to keep their eye on the indicator as they once more send a wave through the rope. Again, ask students if the wave causes matter to be moved horizontally through space. Inquire why they may have changed their opinion. Reinforce through discussion that waves are energy passing through matter (water and sound) or space (electromagnetic radiation). Have students relate this to observations they have made in nature, such as ocean waves (the waves move, not the water) or skipping a rock across water (where the stone moves, not the water.)
Have one student hold the rope and initiate a wave. Ask students to describe the different characteristic components of what they are seeing. Help them associate what they see with scientific terms that can be used to describe all wave motions, of a rope, or sound, or light-amplitude, wavelength, frequency, etc. If this demonstration is done outside, close to a wall which can be marked up, chalk marks can be used to show each of the measurements. Explain that wavelength is a measure from the crest of a wave to the next crest. Amplitude is a measure from the rest position (in this case of the rope) to the crest or trough (which will be the same.) Frequency is the number of wave crests that pass a point in one second. Record this data in their logbooks.
Provide each team with a square of aluminum foil. Have them use a straight pin to punch two holes about 0.5 cm apart. Turn on the flashlight or other bright light. Have them take turns holding the light and looking through the foil. Hold the aluminum foil about 30 cm in front of their faces. Close one eye and look through both holes. They should be able to see the crests and troughs in the light emitted from the source. Record observations in the SUNlogs.
1.3.3 Herschel and infrared
In 1800 the German-born English astronomer William Herschel examined the solar spectrum using
prisms and heat-sensitive equipment, and discovered that temperatures continue to climb even
where no colors appeared at the red end of the spectrum, meaning that some type of radiation
existed before the red in the visible spectrum, leading to the discovery of infrared
radiation. Materials:
prism We can detect infrared radiation by using heat sensitive paper. Do this as a teacher
demonstration. Place a portable hot plate (with a visible coil) on a demonstration table. Turn
the heater on, and bring the heat sensitive paper close. As you approach, the color of the paper
will change indicating that heat is present, though no light is being generated. This is
infrared radiation. As time passes, the coils of the heater will begin to glow red. If this was a
"magic" heater and continued to get hotter and hotter, the color would eventually
change to orange, yellow, etc.-just as we can see stars do as their temperatures increase
(Activity 1.4, Life Cycle of the Stars, in the printed Guide.) How did humans first realize heat and light were related? Duplicating Hershels experiment
with the kind of thermometers found in most schools science labs is "challenging"! But
if you have access to a thermal probe you might want to attempt this. Cast a large spectrum onto a table top using sunlight through an open window. Place
thermometers or sensors in the violet and red bands of color, and just beyond the red end of the
spectrum. Place a fourth thermometer well away from the other three to act as a control. See if
you detect a temperature change. The different colors should generate different temperatures. http://www.ipac.caltech.edu/Outreach/Edu/herschel_experiment.html For anyone attempting the Hershel Experiment, this site is a must. It includes a detailed
description of how to set up the experiment as well as actual photos of the lab in action! Activity 1.3.4 Ritter and ultraviolet
(If you have the PASSPORT TO THE SUN Multimedia Kit you will find a set of UV beads: a
suggested extension Activity will soon be e-mail to Kit purchasers and posted online.) Teacher Background:
In 1801 the German physicist Johann Wilhelm Ritter discovered that silver chloride (similar to
present-day photographic paper) darkened in an area of the spectrum beyond the violet, leading to
the discovery of ultraviolet radiation. Materials:
blue line paper (or blueprint paper) Set a prism on end and project a spectrum into a shadow. (Consider moving a table close to a
window and setting a large book on end to cast the shadow. Then aim the spectrum from the prism
at the shadow.) Cut a sheet of blue-line paper slightly larger than the spectrum cast onto the table. (This
paper is very light sensitive so it would be best to do the cutting in advance, and be sure to
keep the paper well-covered. But place the pieces in an envelope that can be opened easily.) Take
out a sheet of paper and hold it against your body so that light cannot strike it. Place the
paper yellow side up on the spectrum and draw lines on either end of the visible spectrum. Label
the red side with an "R" and the violet side with a "V". When the paper turns white place it in a small amount of ammonia. (Caution: be sure to do this
part of the Activity ONLY in a well-ventilated area.) Push it under using either tongs or a
glass stirring rod. You only need the ammonia deep enough in the pan to cover the paper (no more
than 1 cm). Observe what happens. "The major problem with this is maintaining the spectrum. Do it on a cloudless day. You
also will need to move the prism slightly as the Earth rotates and the Sun appears to move. Be
sure to plan ahead. Have the paper cut, and practice taking it out of the envelope." Charlie
Lindgren The paper should turn blue except for the area that was bleached white by the spectrum. There
also should be an area beyond the line at the violet end that has also turned white. No light was
visible there, but the paper reacted. Some type of radiation must exist beyond the violet end!
This is "ultraviolet." Your students will have to admit that the words
"infra" (or below) red, and "ultra" (beyond) may not be very imaginative-but
they are certainly accurate. This set of Activities should have made them much more meaningful than before. Activity 1.3.5 Hearing Radio Waves
Materials:
2 radios Have two radios on the same station (AM or FM) and playing at a reasonable (what YOU find
reasonable!) level. Place the radios about 50 cm apart. Students should walk around listening for
an area in the room where there is a "loud spot" and where there is a "dead
spot". Ask students to brainstorm why such "loud" and "dead" spots might
happen. What terms do these areas represent in this sound wave? (The dead spots are where crests
and troughs cancel each other out: the loud spots are where crest piles on crest to increase the
apparent loudness. They are interference patterns.) Activity 1.3.6 Putting It All Together
Relating lessons of the hands-on activities to understanding the EMS Note: Each student/team will need a copy of a color electromagnetic spectrum, which can be
obtained from the Suggested URLs, below. Explain/Explore:
Have students study their copy of the EMS. What generalities do they see in terms of
wavelength, frequency, amplitude, and other of the vocabulary words listed for this Activity?
Prompt them to answer the following questions: Expand/Extend/Connect:
Have students choose one area of the EMS, research this type of em radiation and be prepared
to explain to classmates the "pros" and "cons" of using this type in the
presence of humans. Why did the movie ALIEN use the slogan "In space no-one can hear you scream?" (Space
is an almost perfect vacuum, and sound requires jiggling molecules of matter in order to travel
to ones ear.) But the Salvage Vessel "Nostromo" could still communicate with other
craft. How? (Radio waves are electromagnetic radiation wave and can pass through a vacuum.)
Where, in the EMS do radio waves occur in relation to visible light? How might you prove the
difference between the radio waves and sound waves? How might shops and malls, or other public space make use of "loud spots" and
"dead spots" in sound waves to enhance public spaces? Explore this LIVE FROM THE SUN site and follow links to research ways in which the EMS is
being used in astronomy to study the Sun. And submit your own students work (via e-mail to
eb@passporttoknowledge.com) to allow us to share
your explorations of the spectrum with other teachers and students. Suggested URLs:
http://amazing-space.stsci.edu/light/star-light-science.html
light source
heat sensitive paper (sheets provided in the PASSPORT TO THE SUN
Multimedia Kit)
heat source
4 thermometers or probes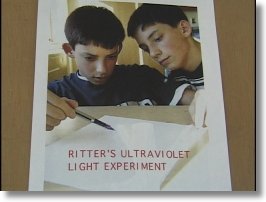
household ammonia
flat pan, such as a photographic developing tray
prism
light source
tongs or glass rod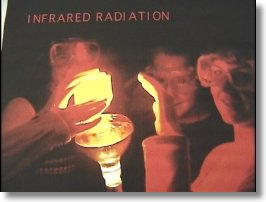
http://www.athena.ivv.nasa.gov/curric/space/lfs/emspectr.html
http://imagine.gsfc.nasa.gov/docs/science/know_l1/emspectrum.html
Excellent background information on the electromagnetic spectrum with links to activities and a
quiz on the electromagnetic spectrum.
http://www.ipac.caltech.edu/Outreach/Edu/
NASA's Infrared Processing and Analysis Center's Infrared Astronomy: a terrific site providing
background information on infrared astronomy from the days of Herschel to the present. Great
infrared images!
http://www.lbl.gov/MicroWorlds/ALSTool/EMSpec/EMSpec.html
Great graphic on the electromagnetic spectrum, and interesting at home experiment on infrared
radiation using a TV remote.
| Barcodes of the Cosmos | Noon Shadows | Horizon Calendar | Star Census | Imagining Lessons | Teacher Activities |
![]()